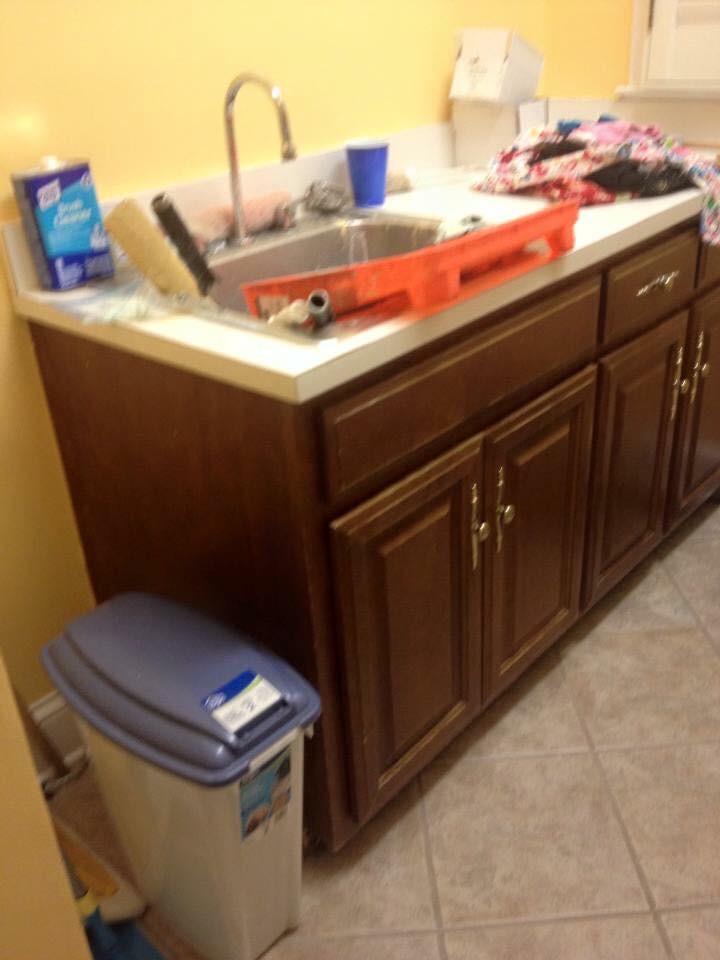
I’m so excited to share my laundry room makeover with you. If you are anything like me, then laundry is that dreaded chore that is put off until absolutely necessary. So, if you hate it already, then doing laundry in an ugly laundry room makes this chore even worse. When we moved into our home a few years ago, the laundry room was not a space I was proud of. It was dated and the walls were bright yellow. Nothing against yellow, but it just wasn’t my thing at all. I knew this room had to be tackled ASAP. Before we get started, here are some before pictures that show the space before the makeover.

As you can see this space wasn’t my style. The lighting was too bright, the wall color was way off, and the cabinets were an outdated wood tone. The laundry room also lacked function. It did have great bones, though, so I knew I could make it beautiful and that was my motivation.
Now, let’s break it down, and I’ll show you easy ways to makeover an outdated laundry room!
Step 1: Update Wall Color
The first step was to paint the walls and the cabinets to brighten it up a bit. I chose a color that was happy because I need happy when I’m doing laundry. The wall color is called Palladian Blue by Benjamin Moore. It made my space seem so much larger and gave it just the tone I wanted.
Step 2: Update The Cabinets
I painted the cabinets with Annie Sloan’s Pure White with a dark wax and added some cute knobs from Hobby Lobby to the cabinets. Love how the cabinets turned out. Painting cabinets are far from my favorite thing to do but I would recommend it for an instant huge upgrade to a space.
Step 3: Add Function to the Space
For the last step, I wanted to add function to my laundry room space and I did this in 3 ways. First I made these open shelves to add storage and organization to my space. Yes, you read that right. I made these shelves all by myself. It was a simple project, but I’m pretty proud of how these babies turned out. I got Lowe’s to cut my wood to fit my desired length. Then, I painted and antiqued them with Annie Sloan’s Pure White, and I found my brackets at Hobby Lobby. Finally, I assembled the brackets to the shelves and hung the completed shelves to the wall. Adding these shelves made my laundry room much more functional.
Ladder Clothes Drying Rack
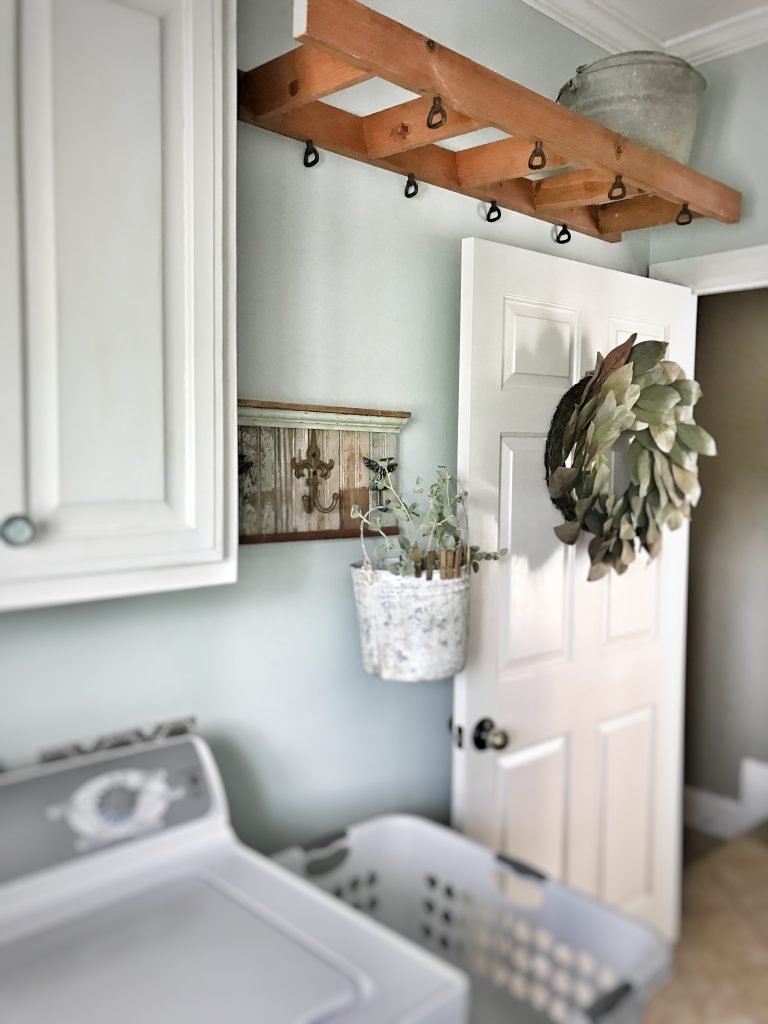
I needed a place to dry my clothes, and knew it would be my best bet to add something to the ceiling because I was running out of space. Luckily, I ran across this ladder when I was out thrifting one day and knew it was a perfect fit and solution. It needed down a little to fit my space. I found these hooks at Hobby Lobby and screwed them in so my clothes could easily hang on the ladder. Such a fun solution to drying clothes!
Laundry Basket Cart
This cart was actually an old ugly wood cart that was not at all supposed to hold laundry baskets. I found this one one of my thrifting trips. When I saw it, a light bulb went off. I knew this would be a perfect laundry basket holder. The size ended up being perfect for this space! I brushed some chalk paint on it and that was it. This little contraption is a LIFESAVER!! Love having a space to keep my baskets on. So functional and so cute!!
So, that’s it! 5 easy steps to updating my laundry room. This is now my happy place! I still dislike laundry but it’s so much better doing laundry in this space! I hope this will motivate you to get out there and make your laundry room (or any room) a space you LOVE!! Thanks so much for stopping by and let me know what you think!!
Shop My Laundry Room
Pin For Later


So cute! I love the ladder idea. Can you just come to the beach and redo mine? Lol
Oh, if it’s the beach then I’m there!! Thank you so much! I’m so glad you like it!
What an amazing transformation! I had to keep comparing photos to see if it really was the same laundry room 😉 Love what you did with it! Thanks for sharing!
Hey Sarah! It was a pretty big transformation! I’m so glad you like it! Thanks so much for visiting my blog!
It is beautiful! Where did you get the large safety pin?
Hey Penny!! Thank you so much!! I believe it is from Homegoods. Good luck with your search.
What is the width of the room? I have a similar shape and trying to figure out if I can put cabinets across from my washer and dryer. Thanks!
Hello, what color stain did you use on the ladder?
Hi Sarah! The ladder was already that color when I bought it.
Is the ladder hanging from the ceiling? Or is cut to fit just right from the cabinet to the wall? I can’t tell in the pic.
Hey Carissa! Love your name! The ladder is hanging on one side in studs. It is very sturdy hanging it this way. You could also hang it from the ceiling. Either way works.
Beautiful! Where did you get the chandelier?
Thank you so much! It came from Lowe’s a few years back.
Hi, after reading this remarkable post i am too cheerful to share my experience
here with friends.
Thank you!
Any chance you can point me in the right direction as to where I can find a tutorial on painting cabinets using the dark wax method? I have no idea what that even is but your cabinets turned out beautiful and I’m interested in trying it.
Hi Nicole! I will try to do a blog post about it very soon. So happy you like how I did them. Thanks so much!
Hi. I love this room!!! I’m curious to know where you purchased your WASH letters….do tell. Lol!
Thanks!!
Hi Stephanie! Thank you!! The letters were at Hobby Lobby in the back crafting section and I just Mod Podged scrapbook paper on them. Super easy project!