Hello sweet friends and welcome to our Have Yourself A Merry Little DIY Blog Hop. I am joining 11 other talented bloggers (listed at the bottom) for a 2 part blog hop. I am so excited to welcome all of you coming from Crisp Collective. Isn’t Bethany’s DIY Christmas printables the cutest! She did such a beautiful job displaying them in her home! So, I hope you are ready to sit down with your favorite cozy blanket and get ready for some fun Christmas DIY’s that anyone can do. Christmas is the perfect time for a fun DIY. Whether you are making a gift for someone or something for yourself, it just feels great to say you did that. My daughter even helped me with my fireplace cover DIY, and she is so proud to say she helped me make something that we are going to use during Christmas and all throughout the year.
I am so excited to share with you this super easy fireplace cover. I have been wanting to do this for so long for so many reasons, but mainly because..
- the inside of my fireplace is so dark and ugly.
- my one year old thinks it’s a good idea to grab a handful of soot and get it everywhere.
- I like the idea of making something useful that looks like a beautiful piece of home decor.
That pretty much sums up why I was so excited to finally get this project completed. Christmas was also the perfect time to do it because I knew it would look so pretty with my natural decor that I was doing this year. So, before I show you how simple this was to make, here is what you need to start with.
Materials For Fireplace Cover DIY
- measuring tape
- 1/2″ piece of plywood
- 1″ x 1″ inch strips of wood
- screws
- black paint
- paint brush
- wood glue
- wood slices (these can come from wood that you slice yourself or from a craft store)
Step 1 – Measure Your Fireplace Opening
My first step was getting the correct measurements. It is very important to measure correctly because you want your insert to fit pretty snug in the opening.
Step 2 – Make Your Insert
This step was super simple to make. All you need is some plywood (about 1/2″ thick) and 1″ x 1″ or 1″ x 2″ wood for the edges. Luckily, I have a pretty handy dad that brought me over some scrap wood that he had laying around, and free is always good. I showed him my measurements and we cut the wood down to size.
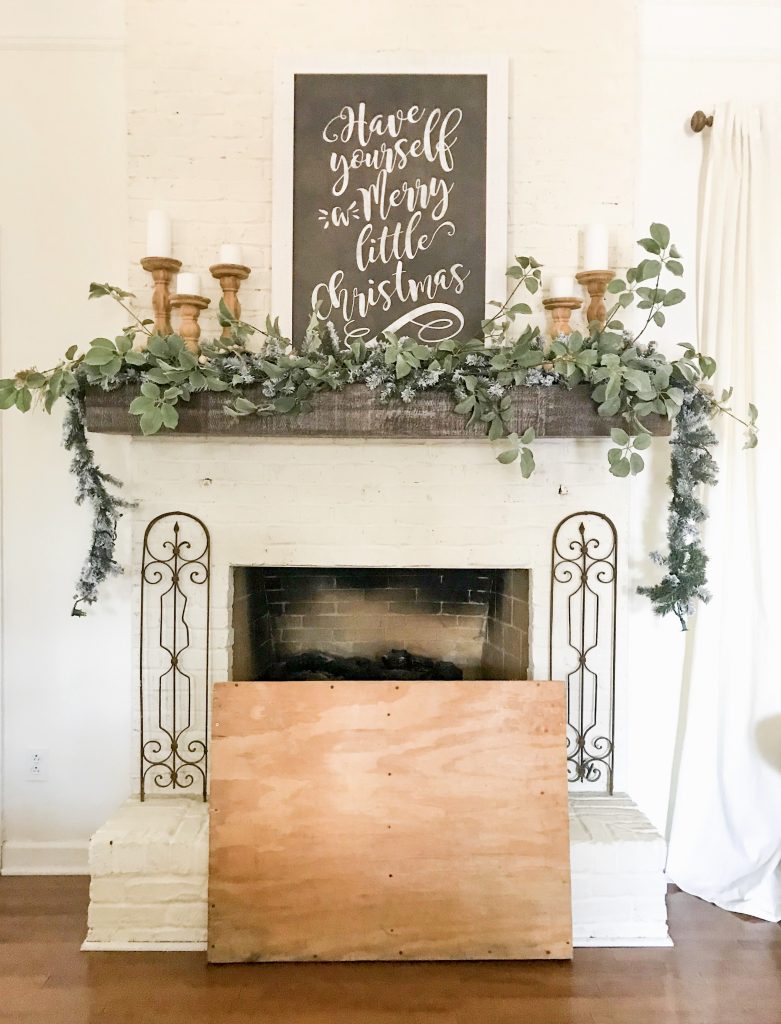
Here is what the front of my insert looks like.
And here is the back. See, super simple. We screwed the the 1″ x 1″ pieces around the back edge of the plywood and down the center. Now, it fits perfectly in my fireplace without falling out.
Step 3 – Paint
After we whipped that together, I pulled out some black paint and painted the front and edges of the cover.
Step 4- Glue and Layer
Now the fun begins. It kinda reminds me of a puzzle. My daughter helped me cover the board with the larger pieces. We covered the entire board with the first layer, and then I went back and glued them on with wood glue. I let them dry for about an hour. Then, we repeated this step with a second layer. We covered the holes with the smaller pieces and then glued. I just continued to glue on pieces until I couldn’t see the black board anymore. Allow the entire cover to dry a couple hours just to be on the safe side.
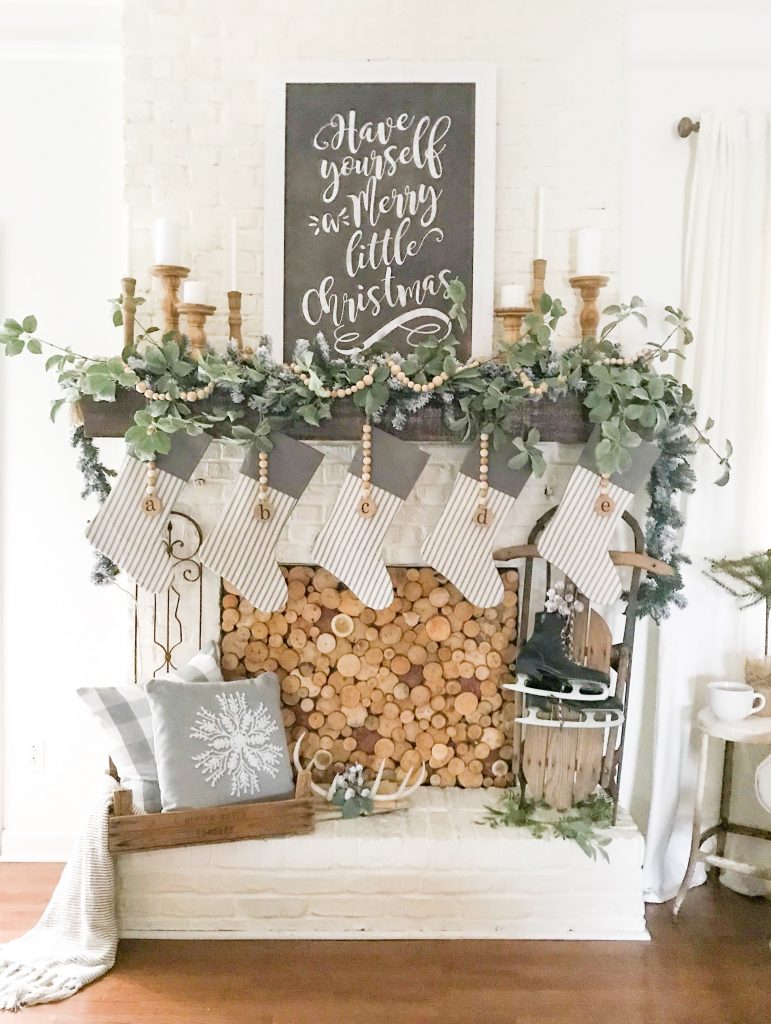
And here is is all finished!!! My wood slice fireplace cover turned out even better than I had dreamed. I just love how it looks like a beautiful piece of art. The different shades of wood pulled all of my Christmas decor together. The best part is that it is super easy to remove when I am ready to start a cozy fire.
Decorating Around Fireplace Cover
I wanted to bring in some other wood elements, so I added a mixture of wood candlesticks and beads to really pull everything together. This year’s design is completely different from my usual red Christmas decor and incorporated more natural elements. It’s a much needed change that I LOVE so much!
Of course I added my favorite green stems.
A little fun fact about my family is that our first names start with the letters A-E, so when I saw these wood bead initials, I knew I had to have them. So cute, right???
When it’s time to cozy up to the fire, just remove it and set aside. So simple and so perfect for this time of year!! If you need me, I’ll be in this spot until Christmas!
I had so much fun creating this DIY wood slice fireplace cover along with getting my mantel all decked out for Christmas. Now, it’s time to continue to be inspired and head to Dana at the Adored House to check out her DIY holiday wreath.
Wednesday
Aratari At Home // The Tattered Pew // My 100 Year Old Home
Crisp Collective // Bless This Nest // Adored House
Thursday
Seeking Lavender Lane // The Honeycomb Home // Joy In Our Home
She Gave It A Go // Grace In My Space // Little Nest of Four


Carissa, this is amazing!! I want one for our fireplace! It looks so beautiful!!
Thank you, Lindsay! It was so easy to make. I loved your DIY also! I’m making that for sure too!
I love this!!! Would love to know where you got the circle pieces of week?
That is Crazy Awesome!!!!!! What a beautiful cover!!!🎄🎄🎄🎄
Oh my goodness, Dina! That makes me so happy that you love it. Thank you so much!!
Wow Carissa I am in love with your mantel and wood slice tutorial. Makes me wish I had a spot for it. This is just so smart and so pretty! Thank you for the inspiration!
You rock Kelly! Thank you for getting this blog hop together. You always do such an amazing job. Thanks girl. So happy you like it!!!
I might try to make this as an early christmas present for my wife. I’ll send pics if I do!
Yay!! I know she would love it. Yes, let me know if you decided to make one.
Your fireplace is gorgeous and the woodslice cover makes it even prettier! Love all your candles and greenery too! So glad to be on this blog hop with you! xo
Thank you so much, Kendra! So happy to do this with you too girl!
Carissa, this is seriously so amazing girl! I am inspired and would love to try doing this for our fireplace. Thanks for sharing and love being on this blog hop with you. xoxo-Brendt
Brendt, thank you friend! I would be honored if you decided to make this. I loved doing this blog hop with you too!
Love this so much! Did you buy or make your wood pieces?
I am so happy you love this project. I really was so easy to do. The wood slices are from Hobby Lobby. Thanks for stopping by the blog!
This is absolutely stunning my friend!! You’ve created such a beautiful focal point.
Thank you so much sweet Sarah! Thanks for visiting!
SO going to make this! Our fireplace is so drafty when not being used…thinking this would help! And were can I find some of those cute wood bead initials?
Yay! That makes me so happy to hear you are going to make one! They are from Hobby Lobby. Thanks for visiting the blog!
Carissa! This is just stunning!! I love it and you are making me absolutely want to do this to ours!! I truly love every detail about the way you styled your mantle!
Hi Bethany! Thank you so much sweet friend! So happy to do this blog hop with you girl!